-
Courses

Courses
Choosing a course is one of the most important decisions you'll ever make! View our courses and see what our students and lecturers have to say about the courses you are interested in at the links below.
-
University Life
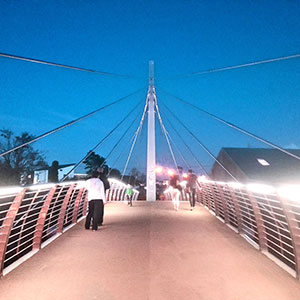
University Life
Each year more than 4,000 choose University of Galway as their University of choice. Find out what life at University of Galway is all about here.
-
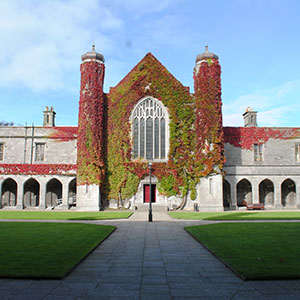
About University of Galway
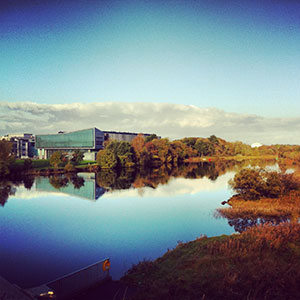
About University of Galway
Since 1845, University of Galway has been sharing the highest quality teaching and research with Ireland and the world. Find out what makes our University so special – from our distinguished history to the latest news and campus developments.
-
Colleges & Schools
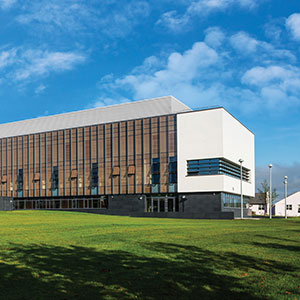
Colleges & Schools
University of Galway has earned international recognition as a research-led university with a commitment to top quality teaching across a range of key areas of expertise.
-
Research & Innovation
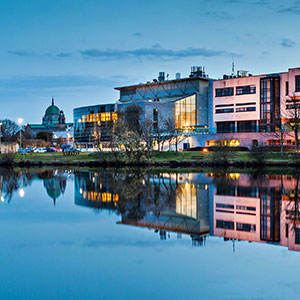
Research & Innovation
University of Galway’s vibrant research community take on some of the most pressing challenges of our times.
-
Business & Industry
Guiding Breakthrough Research at University of Galway
We explore and facilitate commercial opportunities for the research community at University of Galway, as well as facilitating industry partnership.
-
Alumni & Friends

Alumni & Friends
There are 128,000 University of Galway alumni worldwide. Stay connected to your alumni community! Join our social networks and update your details online.
-
Community Engagement
Community Engagement
At University of Galway, we believe that the best learning takes place when you apply what you learn in a real world context. That's why many of our courses include work placements or community projects.


Image FAQs
You'll find the answers to common image- or photo-related questions here.
Browse to media library items (images / documents)?
Media library items are stored in the CMS - The items you see in your Media library may not necessarily be being used by the live website. Once an item is used on a webpage it will automatically be uploaded to the live web server.
As T4 only uploads media items (files/images) to the web server when a webpage is using them, if you stop linking to (or embedding) a media item, or stop publishing the only page that was using it, it will be automatically removed from the web server again, but remain in your Media library.
(Note: Administrators can override this, making individual sub-categories of the media library upload images and/or files - even if those items are not in use.)
How can I browse to media library images (in the CMS)?
If you are in t4, you can go to the media library and see all images there. Click on the 'Content' option in the left hand menu and choose 'Media Library' from the expanded options.
How can I browse to media library images (on the university website)?
Unlike some other websites, you cannot browse to a university web address to click through all the folders and images that have been published by the CMS's Media Library.
However, all media library items, which are in use on the website, are stored on the web server, in subdirectories of https://www.universityofgalway.ie/media/. The exact web address depends on the names of the media library sub-categories (folders) and the number of folders, in the CMS where your file/image is located. If you know the exact location of an individual image, and its filename, you can type the complete path to the image into your browser's address bar to go directly to it.
Normally, only images that are in use by a live page will be uploaded to the live webserver by the CMS - unless an administrator has configured a media library sub-category to always upload its images.
Find out where a document / image is stored in the Media Library?
This answer is for Power users / Administrators only.
If someone else has created a document / image and you want to link to it / use it, you can simply search for it in the media library - you don't need to know the exact category it is stored in (the folders in the Media Library are called 'categories').
If you need to update a document or image, you DO need to know where it was placed in the media library - so that you can open its category first.
There are 2 ways to find out where a media item resides in the media library:
- Look at the published page that links to the document or displays the image. If its an image, right-click it and open it in a new tab. If it's a document, right-click the link and 'Copy Link Location'.
The web address of the item will begin with https://www.nuigalway.ie/media/... Each directory after that is the name of each media category to open (without spaces in it). Except for the very last bit - that's the name of the file.
E.g. https://www.nuigalway.ie/media/informationsolutionsservices/images/saoirse-704x397.jpg indicates that the file saoirse-704x397.jpg is stored in Media Library - Information Solutions Services - Images. - In the media library, you can do the following:
Using the Search field search for the file/image. The more information you have to refine the search will help.
For example, you could search for 'travel' in the Search box and a list of all items with the word Travel in the information will be displayed.
E.g. If your media item is in 'Agresso Files', and this is a sub-category of 'Files' which is, in turn, a sub-category of 'Information Solutions Services', you know you'll find the file in Media Library - Information Solutions Services - Files - Agresso Files.
An image of the item will be shown in the Preview column, and the Category (media library folder) information where the item resides will show under the Media column.
If you click on the Actions button and choose Edit media you will get more information
Click on the Usage tab to see where the image is currently in use.
Click on the Categorization tab to include the image in another category - if the item is edited it will change in all categories it resides in
How do I get to my image's attributes?
If you double click on the actual image (foreground image) the media attributes pop-up will appear.
How do you add a media library image to a page?
If you are replacing an image, you must make sure the new image you're uploading has a different name - if you don't, browsers will show the old image, remembered from when they visited the page before.
When choosing an image you need to fully comply with copyright law. Ensure that you have the right to use any images you upload or insert onto your webpage. Further information is available on our Images FAQ page - Where can I find Images to use on my website.
Ensure its filename does not contain any spaces, and don't use any characters that are reserved for web addresses in its filename ( ! * ' ( ) ; : @ & = + $ , / ? % # [ ] ) or you may not be able to load the image.
To add a foreground image (i.e. one that appears alongside text, they way it would in a word document) to a page:
- Edit some content.
- Click
 to go to the media library.
 - Search the image library for the image to use.
- Click on the Actions button and choose 'Select media'.
- Or click on the name of the item.
How do you add a new image to a page? (Best approach)
All foreground images are stored in Site Manager's media library. Most content types use background images - some content types require these are stored in the media library and others expect you to upload the background image directly into the content type.
Regardless of whether you are adding a foreground or background image, you should prepare your new image. Specifically, it should be sized for the content type you’re planning to use, before you upload.
If you are replacing an image, you must make sure the new image you're uploading has a different name - if you don't, browsers will show the old image, remembered from when they visited the page before. Also ensure its filename does not contain any spaces or else it might not upload.
And don't use any characters that are reserved for web addresses in its filename ( ! * ' ( ) ; : @ & = + $ , / ? % # [ ] ) or you may not be able to load the image once it's uploaded.
Accessibility: Always add a meaningful description to an image to assist people using a screen reader.
Preparing the image for the web results in better looking images and a quicker loading webpage, which, translates to a higher google ranking.
Step 1: Prepare your image
First, know which content type you want to add it to.
Then size the image for that content type and web-optimise it by following the instructions in the Resizing Images section of the website
(Going slow, reading and following these instructions takes me under 2 minutes. Once you’ve done it a few times, it’ll take you ~1 minute each time.)
Step 2: Upload it to Site Manager's Media Library (all foreground images and any background images for content types that use the media library)
Because your image doesn’t need to be resized, adding it via the media library is a straightforward task:
Edit your content as usual. When you need to specify an image (or want to add one):
- Click the link to go into the media library
- 2. On the Media categories on the left hand side, , click into the category you want to upload your image to.
- 3. Click the +Add media button

- To add your image go to Media file and click on the 'Drop file here or click to choose' field to choose your web-ready image from your computer. Or Drag and drop your image into this box.
- Fill in the name, description and keywords for the new image.
- Set the media type to ‘Image (foreground)’ or ‘Image Path (CSS)’
Tip: 'Image (foreground)' is for when you want to include an image via the WYSIWYG editor. E.g. when using a 'Content', 'Content (no title)', or 'Course template 1' (or 2) content type. Most other content types require a background image - aka 'Image Path (CSS)'. - You will see your new image has bee added to your media library category
- To insert the new image into your content click on the Actions button and choose Select media
Uploading an image to the media library does not take long. I timed myself from step 2-8. I wasted some time when filling in the fields (and also when deciding on which image to upload) but despite this, my image was uploaded and added to the page in under 2 minutes.
How do you change how my foreground image appears on the page?
After adding your foreground image, you can left- or right-justify it, add a border, and make it circular / oval. Some options will also display the image's description (from the media library) as a caption below the image. For complete information, see Foreground Images.
Please note: You cannot centre the foreground images that you add to pages - our design rules prevent it.
How do you make an image web-ready?
Print quality images, from a standard digital camera, are anywhere between 4 and 30 times bigger than they need to be for your website. These slow down your page load times and can cause errors on the user's device by clogging up memory.
Web ready images are far smaller in size than print-quality images but there's no discernible difference in quality.
Before you upload an image to Site Manager, it needs to be resized, and possibly cropped, to the correct dimensions for your intended content type. It also should be converted to 96 dots per inch, instead of 300.
We've made this easy for you. Just follow the steps outlined in the Resizing Images section of the website.
Ensure its filename does not contain any spaces and don't use any characters that are reserved for web addresses in its filename ( ! * ' ( ) ; : @ & = + $ , / ? % # [ ] ) or you may not be able to load the image once it's uploaded.
Accessibility: Always add a meaningful description to an image to assist people using a screen reader.
How do you turn an image into a link?
Foreground images, uploaded to the Media Library, can be added to any content type that uses the WYSIWYG editor. Once added, they can be turned into links by right-clicking on the image, and clicking 'Insert Link'.
Several Content Types allow you to add an image, making it a link. These are listed on the Images FAQ page: Which Content Types allow me to link to another page?
Some of these content types expect you to select a background image, from the Media Library.
Others expect you to to attach an image directly to the content type.
And each content type expects the image to be a different size. To see what size to make it, whether to upload the file to the media library or attach it directly, and how to resize it, see the Image Resizing FAQ page.
How do you turn different parts of an image into links?
You do this by first sizing the image for your page and then defining an image map, which tells the browsers which bits of the image are clickable.
Full information is available here: Creating Image Maps
Make the media library upload images / documents to the web server?
Things in the media library are not uploaded to the web server as soon as they are added - putting them in the media library just adds them to the CMS.
The CMS won't upload them to the web server until it knows they are needed (i.e. embedded / linked to) by a live webpage.
Automatic uploading
If you include the image/document in a content type (using ), it will automatically upload to the web server - so long as that content type is approved, and the section containing it, is also approved.
Similarly, if you add a media item to a content type (using  ), the media item will upload at the same time as the updated webpage.
Conversely, If this content or section ever gets set to 'Pending' or 'Inactive' (aka deleted), the media item will be removed from the web server because the CMS thinks it's no longer being used on the website
What to do when auto-uploading doesn't work
Sometimes, you need to make the CMS upload media library images/documents - because the CMS doesn't know they are in use! There are a few common reasons for this:
Scenario 1 - You typed in the web address
If you just type the location of an image/document into some part of the CMS (e.g. into an 'External link' or 'External Address' field), or reference/link to it in some HTML code, the CMS will not know that it has to upload that image.
The easiest fixes are as follows:
If you typed the expected web address into:
- an External link (in the WYSIWYG editor):
- Delete the link with

- Add a link to the media item with
- Delete the link with
- an 'External Address' field (in a content type):
- Make the Media Library always upload files of that type (see below)
- Make the Media Library always upload files of that type (see below)
- an 'NUIG Code Only' or 'PHP Code Only' content type:
- Go to the media library to get the media item's id (e.g 400922)
- Replace your hard-coded web address with an instruction for the CMS to add the web address: e.g. <t4 type="media" formatter="image/path" id="400922" />
Scenario 2 - You don't want to link to the document on the website
Very occasionally, users need to upload a document or image to the website without linking to it from any of their pages. Usually this is so that they can link to it in an email.
In this case, they need to make the Media Library always upload files of that type (see below).
How to make the Media Library always upload files
Power users and administrators can configure the Media library to always upload files of a specific type (e.g. Microsoft Office Documents, Foreground Images) that are added to a specific category of the media library. Instructions: How to make t4 always upload files (media library).
Moderators (normal users) cannot configure the CMS in this way but they can:
- Publish a hidden page that uses this file (to make the CMS upload it):
- Add a new section to your site (that does not show in navigation)
- Add a 'Content (no title)' content type to this section
- In this content, add a link to your media item, using
- Save and approve your changes
- Wait for the hidden page (and the media library file it uses) to publish.
- Log a ticket to ask an ISS administrator to give you an 'Always Upload' sub-category.
- Clearly specify the Media Library category you want to add it to
- Specify the type of media item you want to always upload when it's added here.
What size should my image be?
That depends on a few things:
Is it a foreground image (embedded into a WYSIWYG editor, using its 'Insert Media' button: ) or a background image (selected when adding / modifying a content type).
Foreground Images
For full information on foreground images (including how wide they can be on different types of webpages), see our Foreground Images Example / Info Page.
Background Images
The image size depends on the content type you need it for. You can quickly see each content type's required size in the FAQ item: Which content types need images, where do they go, and what size should they be?
Alternatively, you can get this information in the Component Manual or from our Resizing Images section of the website.
Usually, you can also find out by hovering over the image name or field (a help comment will appear), whenever you're adding / editing a content type.
Video Demonstration: How to know what size image is needed.
Where can I find Images to use on my site
As a public body we have to ensure we comply fully with copyright law – and there are legal agencies out there that are continuously scanning public body websites for copyright infringements. They will sue on the behalf of the image owners if they discover us using any illegal or unlicensed images. They take a significant cut of any payout, which makes the effort of looking for copyright infringements worthwhile for them.
To be clear, there is no problem adding photos you took yourself, images the University commissioned, or royalty-free images from free or paid online services, such as:
-
pixabay.com/photos/ (free / paid)
-
unsplash.com/ (free / paid)
-
www.pexels.com/ (free)
-
www.freeimages.com/photo (free / paid)
-
elements.envato.com/photos/ (paid)
- shutterstock.com (paid)
Note: You should retain the relevant licensing information for any paid images.
Do not download images from other websites or from a google/Bing image search. That would be intellectual property theft.
Given the advice above, any images already in the Media Library are deemed to have been uploaded as 'Free of Copyright'. You can use anything that you find in the media library but if adding new images to it, first make sure you have a right to use them on the website.
Which content types need images, where do they go, and what size should they be?
Copyright considerations
You need to fully comply with copyright law. Ensure that you have the right to use any images you upload or insert onto your webpage. Further information is available on our Images FAQ page - Where can I find Images to use on my website.
Foreground Images
All foreground images are stored in Site Manager's media library. You can add these, alongside your content, any time you're in a content type that uses the WYSIWYG editor - just click the editor's 'Insert Media' button.
They can be any width, up to the maximum space on the page. These maximum widths are:
Normal page (left-nav, no rightbar): 735px
Normal page (left-nav & rightbar): 450px
Widescreen: 990px
Ultra-wide: 1386px
For full information on working with foreground images , see our example page.
Background Images
Content types that incorporate images use background images - either the background image goes in the media library or else you attach it directly to the content type.
| Content Type | Size | Upload to Media Library | Attach to Content Type |
|---|---|---|---|
| College Page Hero Image | 1600 x 550 | - | Yes |
| Content Block with Image | 600 x 330 | - | Yes |
| Custom Landing Page Image | 1600 x 250 | Yes | - |
| Course Image Banner | 1600 x 711 | Yes | - |
| Course Video (thumbnail) | 144 x 100 | Yes | - |
| Download | 310 x 175 | Yes | - |
| Expanding Image Panel Item | 1600 x 1138 (desktop) 640 x 400 (mobile) |
- | Yes |
| Feature | 56 x 56 | Yes | - |
| Homepage Hero Image | 1600 x 680 | - | Yes |
| Image gallery: Carousel Images | 1600 x 830 (max) | Yes | - |
| Image Roundel (with description) | 400 x400 | - | Yes |
| Image: Static Image | 800 x 800 (max) | Yes | - |
| Homepage Parallax Sliding | Main: 1600 x 1069 Mobile: 767 x 400 Small: 480 x 290 |
- | Yes |
| In the Media Box | 110 x 110 | - | Yes |
| Interactive Video Gallery | 1200 x 800 | - | Yes |
| Landing Page Box | Large: 362 x 180 Small: 176 x 180 |
Yes | - |
| Large Content Box with Image | 176 x 176 | Yes | - |
| NUIG News | News: 705 x 400 Author: 200 x 200 |
Yes | - |
| Promo Box Large | 310 x 220 | - | Yes |
| Six Promo Image Boxes | 704 x 520 | - | Yes |
| Staff Contact | 150 x 128 | Yes | - |
| Staff List Item | 320 x 320 | - | Yes |
| Standard Media Library | First thumbnail: 584 x 584 Other thumbnails: 288 x 288 Full-Sized images: 800 x 600 |
- | Yes |
| Testimonial | 130 x 130 | - | Yes |
| Testimonial Background Image |
Full-sized: 1600 x 1066 |
Yes | - |
| Three Promo Image Boxes | 704 x 520 | - | Yes |
| Three Roundel Promos | 400 x 400 | - | Yes |
| Two Promo Image Boxes | 704 x 520 | - | Yes |
| Widescreen Hero Image | 1600 x 500 | - | Yes |
| Widescreen Landing Page Additional Features | Left feature 1 or 2: 650 x 367 Right feature 1 - 4: 310 x 175 |
- | Yes |
| Widescreen Landing Page Stacked Features | 740 x 378 | - | Yes |
| Widescreen Promo Images 2 Columns | 960 x 532 | - | Yes |
| Widescreen Promo Images 3 Columns | 620 x 340 | - | Yes |
Why can't I add my image into the CMS?
When adding an image to a content type, if a red error message appears, it is because the filename is too short.
It has to have at least 3 characters (before the dot) - e.g. 'bw1.jpg' - anything shorter than this will cause the error.
This issue does not affect the media library, which accepts images with filenames as short as '1.jpg'.
Why do I see some text instead of an image?
When you upload an image to the image library, you must say what type of image it is.
There are 2 types of image: 'Image (foreground)' and 'Image Path (CSS)'.
Think of these as foreground and background images.
In T4, Foreground images are used in the WYSYWYG editor.
Background images are used when a content type asks you to select an image.
If you use the wrong one, you'll see text instead of the image. E.g:
/terminalfour/SiteManager?ctfn=downloads&fnno=60&ceid=1608966529
or
" " alt="Some text in here"
To fix this:
- Open the Media Library and find the image you need to fix.
- Click on the Actions button and choose Edit
- First click on the Usage tab to check if the image is in use elsewhere on the website.
If it is in use, First Download the media file by clicking on the Download button.
Click the Cancel button to return to the media library
Click on the +Add media button to upload the image you just downloaded
Give it a different name and make sure the Media type is set to 'Image (Foreground)'
Insert the image into your content.
If the image is not in use elsewhere on the website,
Click on the General tab,
Go to Advanced options and change the Media type to 'Image (Foreground)'
Why won't my image load?
If you are using an 'NUI Code only' or 'PHP Code Only' content type, the CMS doesn't know it has to upload the image you've referenced. In this case, make sure the media library auto-uploads the image (instructions).
If you have added an image to any other content type and is not loading on the website, this is usually down to one of 3 things:
- It might not have uploaded to the web server - make sure the content type that uses this image is Approved, so that t4 knows it's in use and will then upload the image.
- Spaces in the image's filename can also prevent the upload from working - so rename your images.
- Ensure the file name has at least 3 characters (before the dot) or it might not upload. (only applies to images uploaded from your computer).
- It may have uploaded but its name contains a reserved character that breaks the instruction (to the browser) to include that image:
So, always avoid the following characters in the image's filename, as they have special meaning for web browsers: ! * ' ( ) ; : @ & = + $ , / ? % # [ ] - Media library images are either background images - t4 calls them 'Image Path (CSS)' - or else foreground images - Image (foreground) in t4. Whenever you upload an image to the media library, you have to specify which type it is. Most content types require a background image. Using the wrong type of image will mean it will not load (you may see some random text instead). To fix this see - Why do I see some text instead of an image?


