-
Courses

Courses
Choosing a course is one of the most important decisions you'll ever make! View our courses and see what our students and lecturers have to say about the courses you are interested in at the links below.
-
University Life

University Life
Each year more than 4,000 choose University of Galway as their University of choice. Find out what life at University of Galway is all about here.
-
About University of Galway

About University of Galway
Since 1845, University of Galway has been sharing the highest quality teaching and research with Ireland and the world. Find out what makes our University so special – from our distinguished history to the latest news and campus developments.
-
Colleges & Schools

Colleges & Schools
University of Galway has earned international recognition as a research-led university with a commitment to top quality teaching across a range of key areas of expertise.
-
Research & Innovation

Research & Innovation
University of Galway’s vibrant research community take on some of the most pressing challenges of our times.
-
Business & Industry

Guiding Breakthrough Research at University of Galway
We explore and facilitate commercial opportunities for the research community at University of Galway, as well as facilitating industry partnership.
-
Alumni & Friends

Alumni & Friends
There are 128,000 University of Galway alumni worldwide. Stay connected to your alumni community! Join our social networks and update your details online.
-
Community Engagement

Community Engagement
At University of Galway, we believe that the best learning takes place when you apply what you learn in a real world context. That's why many of our courses include work placements or community projects.


Client-based VPN

A client-based Virtual Private Network (VPN) service to allow users to access application services that are typically restricted to the University of Galway wired network.
The following systems can be accessed using a client-based VPN:
- Agresso P2P Invoicing
- Custom application/system: For example, HR Office applications, License servers, Unix-based machines (typically SSH) etc.
- All macOS/Linux users: All users working remotely using a macOS/Linux device must use the Client-based VPN.
Request access
Financial System (Agresso) - Invoicing
To request access, log a ticket with the Library & IT Service Desk under the following category:

Include the following information in the Request Detail box
- The name of the staff member requiring the access
- Email address of the staff member
- University of Galway Staff ID
- Operating system of your off-campus device
- Remember to tell us that you require remote access to Financial System (Agresso) - Invoicing
Ensure that your PC/laptop meet ISS security requirements to allow the VPN service to be installed on your computer.
Custom application/system
To request access, log a ticket with the Library & IT Service Desk under the following category:
Include the following information in the Request Detail box:
- The name of the staff member requiring the access
- Email address of the staff member
- University of Galway Staff ID
- Operating system of your off-campus device
- IP Address(es) of the service/system and ports that you require access to (for example: access to 10.1.2.3 over https tcp/443)
- Include as much information about the system or service you require access to.
- Reason for requesting access
- Remember to tell us that you require a Client-based VPN
Ensure that your PC/laptop meet ISS security requirements to allow the VPN service to be installed on your computer.
Note: Students/external users should log a ticket with an approval email from their Head of Unit.
Install the Client-based VPN
The instructions below are based on a Windows 11 device. Other combinations will follow a similar process with slightly different screen messages.
Windows 11
- Download the Ivanti Secure Client for Windows
- Open and run the installation executable
- Once the client has been installed, create a connection:
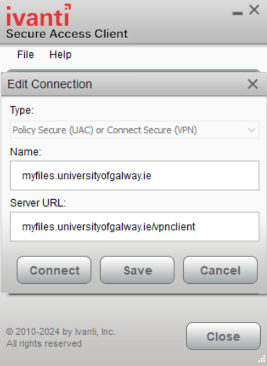
- Click Connect.
-
When connected, you should also see the Ivanti Secure icon will be added to the taskbar and you can connect/disconnect from there:
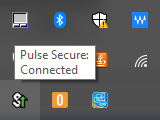
You may log out of the VPN connection via the client itself by right clicking on the icon, and selecting disconnect.
macOS
- Download the Ivanti Secure Client for macOS
- Open and run the installation executable
- Once the client has been installed, create a connection:
- lick Connect
-
When connected, you should also see the Ivanti Secure icon will be added to the top bar. You can connect/disconnect from there.
You may log out of the VPN connection via the client itself by right clicking on the icon, and selecting disconnect.
Linux
ISS provide support for Linux versions on a best effort basis only.
At time of writing, the following Linux versions are currently supported by Ivanti Secure. All clients connecting to the VPN service must be up-to-date and receiving security patches.
- Ubuntu 24.04 LTS and later
- Debian 13 and later
- CentOS 9 and later
- RHEL 7.9 and later
It may be possible to install the client on other versions of Linux and the following step by step instructions include steps for supported and unsupported clients. These instructions covers installation on Ubuntu 19.04 which is an unsupported client from the perspective of Ivanti Secure.
On a supported version of Linux, download the client, install it, install dependencies (step 4), and jump straight to the step 9
- Download the version for your Linux Distribution (you may be asked to login to your Office 365 account to access these links):
32 bit CentOS\RHEL - Click Here32 bit Unbuntu\Debian - Cick Here
64 bit CentOS\RHEL - Click Here
64 bit Unbuntu\Debian - Click Here
The below parts will require to switch to root either using the sudo su - or su -.
- Install the client:
dpkg -i ps-pulse-linux-9.1r2.0-b69-ubuntu-debian-64-bit-installer.deb
- Edit the hardcoded Ubuntu versions to add support for 19.04:
cd /usr/local/pulse/
sed -i "s/UBUNTU_VER\ \=\ 18\ \]/& \|\|\ [\ \$UBUNTU_VER\ \=\ 19 \]/" PulseClient_x86_64.sh
- Install missing dependencies for the Pulse Client (there will be some errors that we fix later):
cd /usr/local/pulse/
./PulseClient_x86_64.sh install_dependency_packages
- Create extra folders for missing dependencies:
cd /usr/local/pulse/
mkdir /usr/local/pulse/extra
mkdir /usr/local/pulse/debs
- Download missing/old libraries:cd /usr/local/pulse/debs
wget http://archive.ubuntu.com/ubuntu/pool/main/i/icu/libicu60_60.2-3ubuntu3_amd64.deb
wget http://archive.ubuntu.com/ubuntu/pool/universe/w/webkitgtk/libjavascriptcoregtk-1.0-0_2.4.11-4_amd64.deb
wget http://archive.ubuntu.com/ubuntu/pool/universe/w/webkitgtk/libwebkitgtk-1.0-0_2.4.11-4_amd64.deb
- Extract the downloaded deb packages, don’t install them:
cd /usr/local/pulse/extra
dpkg -x /usr/local/pulse/debs/libicu60_60.2-3ubuntu3_amd64.deb .
dpkg -x /usr/local/pulse/debs/libjavascriptcoregtk-1.0-0_2.4.11-4_amd64.deb .dpkg -x /usr/local/pulse/debs/libwebkitgtk-1.0-0_2.4.11-4_amd64.deb . - Edit the Pulse Client shortcut (I use vim editor, but nano, emacs, etc. can be used):
vim /usr/share/applications/pulseUi.desktop
Change the Exec= to Exec=/usr/bin/env
LD_LIBRARY_PATH=/usr/local/pulse/extra/usr/lib/x86_64-linux-gnu:$LD_LIBRARY_PATH /usr/local/pulse/pulseUi - Download the CA certificate, open Downloads folder and right click -> Open in terminal:
cp DigiCertCA.crt /usr/local/share/ca-certificates/
update-ca-certificates
Updating certificates in /etc/ssl/certs...
1 added, 0 removed; done.
Running hooks in /etc/ca-certificates/update.d...
done. - Reboot your PC
- Launch the Pulse Client UI from the Ubuntu Search utility
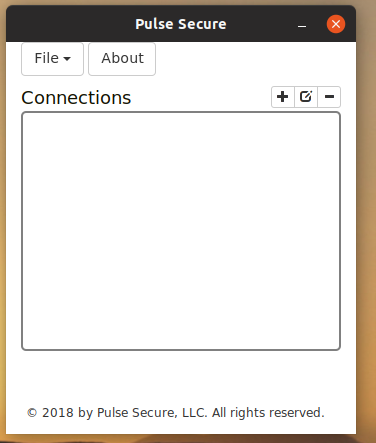
- Add a new connection and save.
Name: University of Galway
URL: https://myfiles.universityofgalway.ie/vpnclient - Now you should be able to connect to the VPN.
Connect to the Client-based VPN
Windows 11
The instructions below are based on using a Windows 11 device. Other combinations will follow a similar process (with slightly different screen messages).
- Open the Hidden icons on the bottom ribbon.
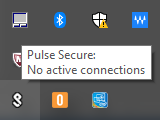
- Right click on the Ivanti Secure Access icon and select your connection to connect.
- Click Proceed and sign in using your Campus Account and MFA
- Client will connect.
- To check status, right click icon, select Open Ivanti Secure Access to view interface below.
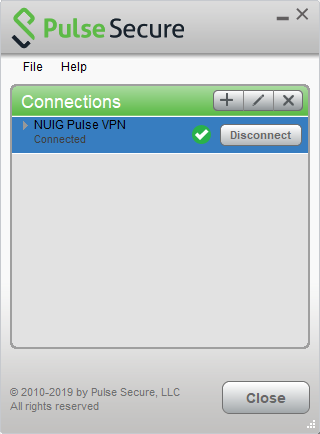
- Disconnect VPN connection by clicking on Disconnect button.
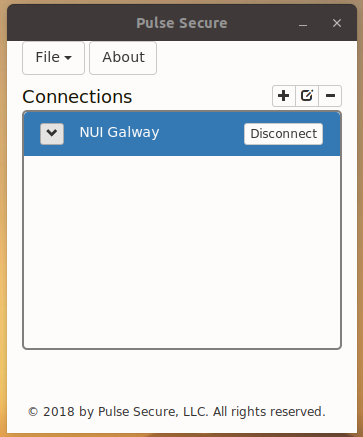
Linux
- Launch the Ivanti Secure Client UI
- Connect to the VPN
- You should now be connected:
Troubleshooting
Slow internet speeds when connecting to the Client-based VPN
We are aware of a bug affecting some Client-based VPN users who are using some editions of the Ivanti Secure client on Windows 10. This has been reported to our software vendor who are working on a fix.
Affected users should download and install the latest version of the Ivanti Secure client.
Unable to access other websites while connected to the Client-based VPN
If you are able to access the required service/application using Client-based VPN, but other websites do not work, please contact the Library & IT Service Desk.


