-
Courses

Courses
Choosing a course is one of the most important decisions you'll ever make! View our courses and see what our students and lecturers have to say about the courses you are interested in at the links below.
-
University Life

University Life
Each year more than 4,000 choose University of Galway as their University of choice. Find out what life at University of Galway is all about here.
-
About University of Galway

About University of Galway
Since 1845, University of Galway has been sharing the highest quality teaching and research with Ireland and the world. Find out what makes our University so special – from our distinguished history to the latest news and campus developments.
-
Colleges & Schools

Colleges & Schools
University of Galway has earned international recognition as a research-led university with a commitment to top quality teaching across a range of key areas of expertise.
-
Research & Innovation

Research & Innovation
University of Galway’s vibrant research community take on some of the most pressing challenges of our times.
-
Business & Industry

Guiding Breakthrough Research at University of Galway
We explore and facilitate commercial opportunities for the research community at University of Galway, as well as facilitating industry partnership.
-
Alumni & Friends

Alumni & Friends
There are 128,000 University of Galway alumni worldwide. Stay connected to your alumni community! Join our social networks and update your details online.
-
Community Engagement

Community Engagement
At University of Galway, we believe that the best learning takes place when you apply what you learn in a real world context. That's why many of our courses include work placements or community projects.


Find IP Address of Printer
How to Connect to a Departmental Networked Printer
- Find out the IP address of the printer
- Download the printer drivers
- Add the printer using the ’Add Printer’ Wizard
1. Find out IP address of the printer
Many printer models provide a menu option to Print a Configuration Page which will contain the printer IP address.
If the option to print a configuration page is not available, if somebody else in your office is connected to the relevant printer, you can get the printer information from their computer. From the Start menu, choose Printers and Faxes (alternatively, choose Settings and then choose Printers and Faxes). Any printers that are connected to that computer will be displayed. Right-click on the printer to which you wish to connect and select Properties from the drop-down menu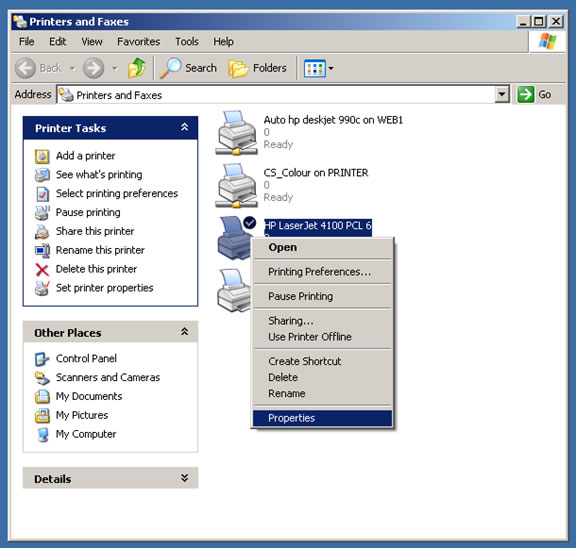
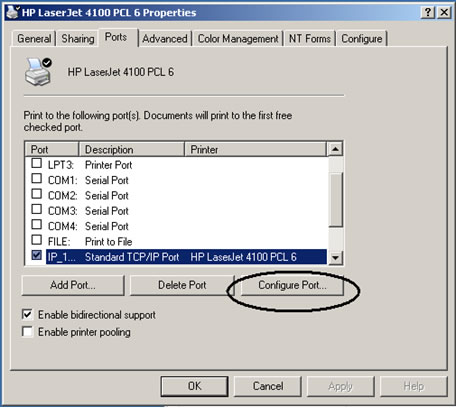
Click on the Ports tab. Then click on the Configure Port… button
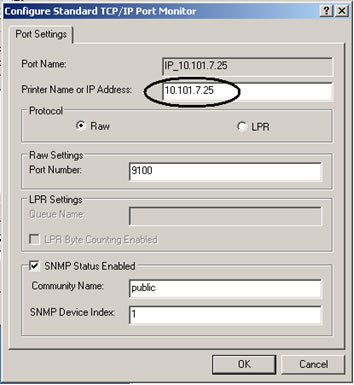
The window that comes up will display the IP address of the Printer. Note this down on a piece of paper along with the name and model of the printer. Click the Cancel Button to close this window
2. Downloading the Printer Driver
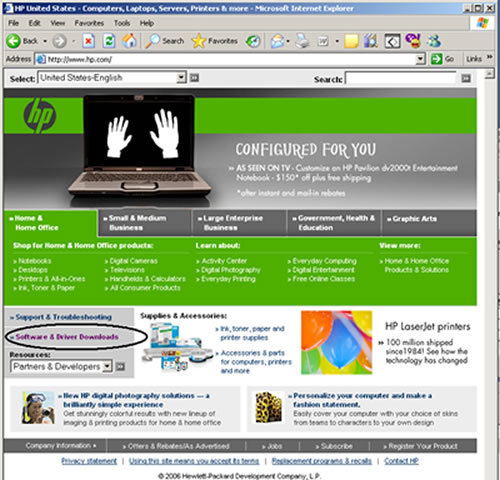
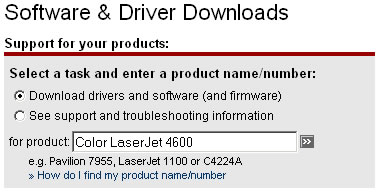
You will most likely need to go online to download the correct driver for your printer. To do this for a HP printer, go to http://www.hp.com/ and select Software & Driver Downloads from the menu on the left
Under Software & Drivers Downloads, enter the model of your printer (as written on the front of the printer), and click the search (>>) button
Select your printer from the resulting list. On the next page, select your operating system from the list
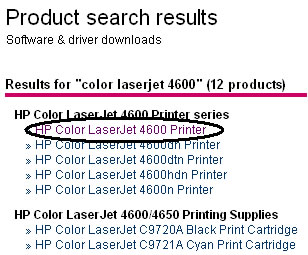
On the next page, scroll down to the section entitled Drivers and select your printer. There may be variations on the title of the printer such as ’HP Color LaserJet 4600 PCL5’ or ’HP Color LaserJet 4600 PCL6’. If this is the case, select the PCL6 variation and click on Download

When the file download window appears, click Save and in the next window select your Desktop as the save location. When the file has finished saving, click Close.
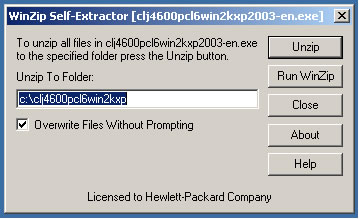
You will now need to unzip the downloaded file. Double-click the file on your desktop. You may get a Security warning saying ’The publisher could not be verified’ and asking if you’re sure you want to run this software. If so, Click Run. The Winzip Self-Extractor window will come up. Take note of where the files are being unzipped to and click Unzip
A window will pop up telling you that the files have unzipped successfully. Click OK.
Click Close on the Winzip Self-Extractor Window.
3. Adding the Printer
Now that you have the Printer information, you can add the printer to your system using the Add a Printer Wizard.
On your own computer, from the Start menu, choose Printers and Faxes (alternatively, choose Settings and then choose Printers and Faxes). On the left hand side of the Printers and Faxes Window, click Add a Printer from the Printer Tasks menu

The Add Printer Wizard will appear. Click Next.
The Local or Network Printer window will appear. Select the option Local printer attached to this computer ensuring that you have un-ticked Automatically detect and install my plug and play printer
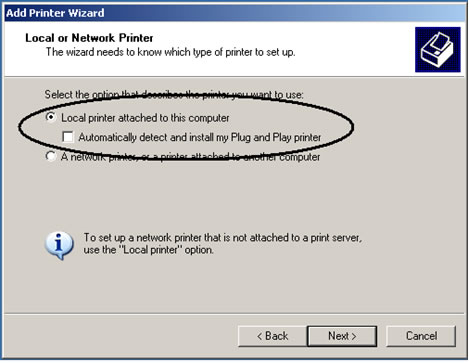
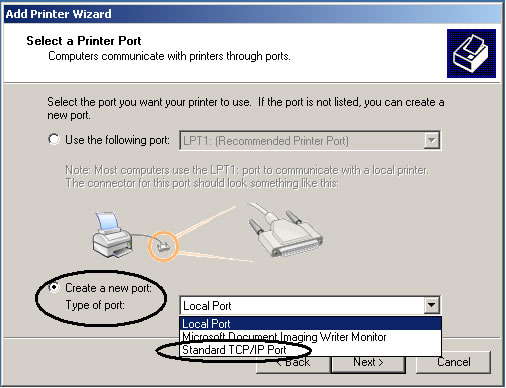
Click Next. The Select a Printer Port window will appear.
Select Create a new port and click on the drop-down menu.
From the drop-down menu select, Standard TCP/IP Port. Click Next
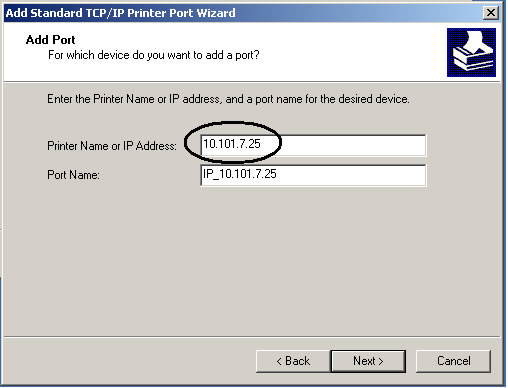
The Add Standard TCP/IP Printer Port Wizard will appear. Click Next.
In the Printer Name or IP Address field, enter the IP address that you wrote down earlier. This will also automatically fill in the Port Name field. Click Next
This brings you to the end of the Add Standard TCP/IP Printer Port wizard.
Click Finish to accept the settings and exit the wizard.
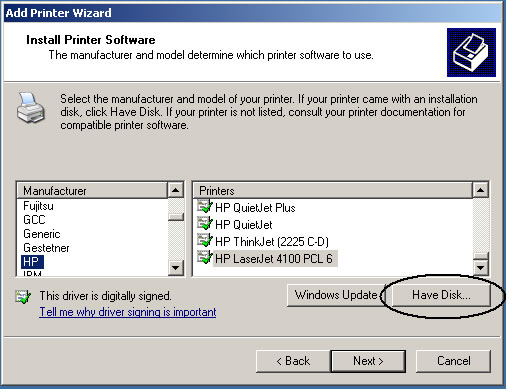
You return to the Add Printer Wizard where you will be asked to Install Printer Software.
Click Have Disk…
In the resulting Install from Disk window, select the Browse… button from the bottom right corner.
Browse to the location that you unzipped the files to. When you select this directory, the appropriate *.inf file will automatically be completed. Click Open
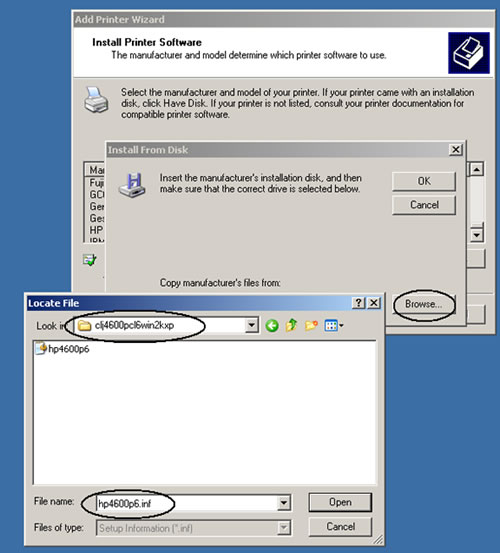
You will return to the Install from Disk window. Click OK.
You will return to the Add Printer Wizard.
Note: The required printer should now be listed in the Printers list.
Click Next

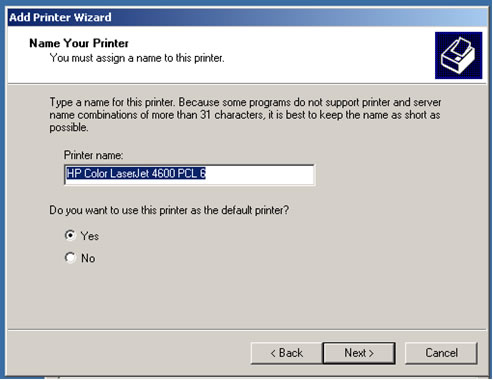
The Name Your Printer window will appear. Click Next
You are prompted to print a test page. Select Yes and then click Next.
This will bring up the final window of the Add Printer Wizard. Click Finish


