-
Courses

Courses
Choosing a course is one of the most important decisions you'll ever make! View our courses and see what our students and lecturers have to say about the courses you are interested in at the links below.
-
University Life
University Life
Each year more than 4,000 choose University of Galway as their University of choice. Find out what life at University of Galway is all about here.
-
About University of Galway
About University of Galway
Since 1845, University of Galway has been sharing the highest quality teaching and research with Ireland and the world. Find out what makes our University so special – from our distinguished history to the latest news and campus developments.
-
Colleges & Schools
Colleges & Schools
University of Galway has earned international recognition as a research-led university with a commitment to top quality teaching across a range of key areas of expertise.
-
Research & Innovation
Research & Innovation
University of Galway’s vibrant research community take on some of the most pressing challenges of our times.
-
Business & Industry
Guiding Breakthrough Research at University of Galway
We explore and facilitate commercial opportunities for the research community at University of Galway, as well as facilitating industry partnership.
-
Alumni & Friends

Alumni & Friends
There are 128,000 University of Galway alumni worldwide. Stay connected to your alumni community! Join our social networks and update your details online.
-
Community Engagement
Community Engagement
At University of Galway, we believe that the best learning takes place when you apply what you learn in a real world context. That's why many of our courses include work placements or community projects.


Alert Banners
Example yellow banner in the DC.description
ℹ You should not put more than one alert on any page. Also, do not use this content type on course pages - they have a separate alerts system.
Alert Banners
Yellow Banners
By adding an 'Alert Banner (non-course pages)' content type, a banner will appear in the page body (to the right of the leftbar). Using this content type, is useful if you wish to have the same message appear on multiple pages. Simply add the Alert Banner to your first page and then mirror it to all other pages. Then, if you change one, all others will change too.
This content type allows your to select an icon (e.g. warning, info), enter the alert text, and, optionally, add a section link at the end of your alert message (with a configurable label). You can also change the colour of the alert banner, but we recommend using the default yellow colour.
Alternatively, you can place HTML code into the page's DC.Description (if it's empty) to make a full-width. yellow, information banner appear just below the page title, as shown above. See instructions below.
Maroon Banner
By adding some code to an 'NUIG Code Only' content type you can have a maroon banner appear, which is simply a big link, in the page body (to the right of the leftbar). See instructions below.
This method has the added advantage that, on small-screen devices (e.g. mobile phones), it will stick to the bottom of the screen and remain visible, even if the user scrolls down or up.
To test this feature out, simply make your browser window narrow.
How do I create an Alert Banner (in the body of my page)
- Go to the site structure and find the section where you want to add the 'Yellow Alert Banner' to appear on.
- Click on the Actions Button and choose Edit section from the dropdown menu.

- Click on the +Add Content button.

- Choose the content type 'Alert Banner (non-course pages)'.
- Give your content a Name.
- Choose a Symbol to appear on the left of your message text.
- Enter in the text of your alert message in the Message field.
- You also have options to Add a 'Call to Action' link, by ticking the Include a Call to Action Link? checkbox.
- Additional fields will appear, click on the +Add section link button to the section you want the CTA to link to.
- Choose the Background Color you want your CTA Link to have
- Additional fields will appear, click on the +Add section link button to the section you want the CTA to link to.
- To save your changes and put your content on Pending, click Save changes.
Or else,
to save and approve for publishing, click on the small arrow beside Save changes and choose Save and approve.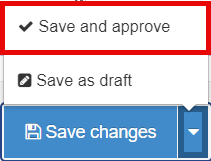
- Go to the Order column, using the crosshairs, drag the content item up or down the list to position it where you want the content to appear on your webpage.
You can mirror the same Alert Banner onto multiple pages. This allows you to change the banner text, on any of those pages, and all other 'mirrors' of that content will automatically change too.
How do I create a Yellow Alert Banner (full-width yellow banner below the page title)
- Go to the site structure and find the section you want the 'Yellow Alert Banner' to appear on.
- Click on the Actions Button and choose Edit section from the dropdown menu.
- Click on the Other tab and choose Metadata from the dropdown menu.
- Copy the following code into the 3: Page Tagline field (as long as it is empty)
<div id='msg' class='info postIt'><span>Your message here</span></div> - Replace the text in the code Your message here with the text you want to appear

- Remove the word info from the code to remove the
 at the start of your message
Note: You can only have one of these banners per page - To save the banner, click 'Save changes'.
Note: Whenever you save a section's settings, those changes will go live on the next scheduled publish. This is different from editing content types, which do not publish until you explicitly approve your changes.
How do I create a Maroon Banner
-
- Go to the site structure and find the section you want the Maroon Banner to appear on.
- Click on the Actions Button and choose Edit section from the dropdown menu.
- Click on the +Add content button
- Choose the content type 'NUIG Code Only' content type.
- Give your content a Name.
- Copy the following code into the Code Field:
<div class="pageButtons" style="width: 100%;"><div class="pageButtonsWrapper"><ul style="display: block !important;"><li><a href="#" class="info"><span>Your text goes here</span></a></li></ul></div></div><style>@media only screen and (max-width: 999px) {div.pageButtons li { display: block !important; }}</style>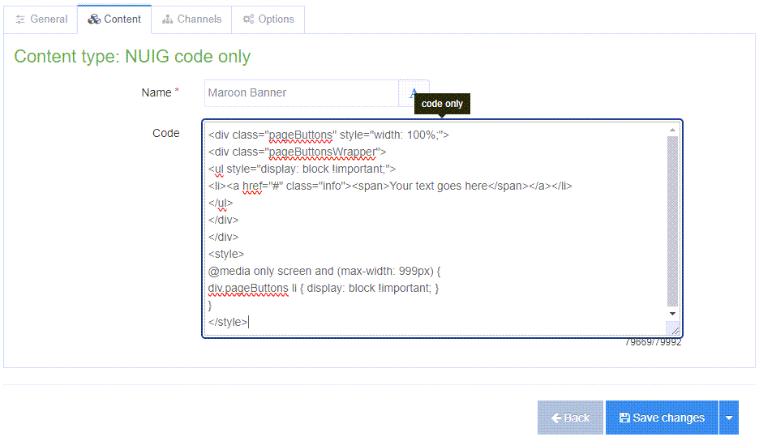
- Replace the text Your text goes here with the text you want to appear

- You can replace the "#" with a web address to turn it into a link, for example:
<a href="//www.universityofgalway.ie"... will bring the user to the University of Galway homepage. - You can change the banner's icon by changing the code
class="info"into:class="howToApply"- for a tick icon
class="findCourse"- for a magnifying-glass-on-a-page icon
- Click on Save changes to put your content on Pending
Or else
Click on the small white arrow beside Save changes and choose Save and approve to approve your content.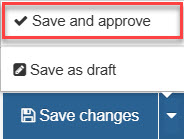
- When viewing your page on a small device, the 'Maroon banner' will 'stick' to the bottom of your screen as you scroll. On larger device screens the 'Maroon banner' will appear (static) where you have placed it in your Content Item list. To put the 'Maroon banner' in a specific position on your page, go to the Order column, using the crosshairs, drag the content item up or down the list to where you want the content to appear on wider screens.
Note: You change a page's width (and other options) using its section's 'Page Customisation Keywords' field - see my interactive demonstration for full information.


