-
Courses

Courses
Choosing a course is one of the most important decisions you'll ever make! View our courses and see what our students and lecturers have to say about the courses you are interested in at the links below.
-
University Life

University Life
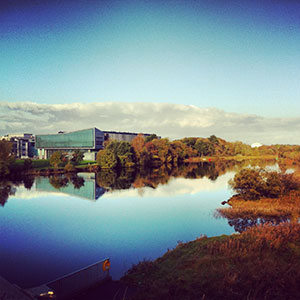
Each year more than 4,000 choose University of Galway as their University of choice. Find out what life at University of Galway is all about here.
-
About University of Galway
About University of Galway
Since 1845, University of Galway has been sharing the highest quality teaching and research with Ireland and the world. Find out what makes our University so special – from our distinguished history to the latest news and campus developments.
-
Colleges & Schools

Colleges & Schools
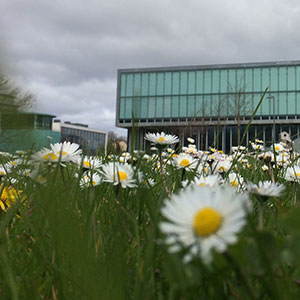
University of Galway has earned international recognition as a research-led university with a commitment to top quality teaching across a range of key areas of expertise.
-
Research & Innovation

Research & Innovation
University of Galway’s vibrant research community take on some of the most pressing challenges of our times.
-
Business & Industry

Guiding Breakthrough Research at University of Galway
We explore and facilitate commercial opportunities for the research community at University of Galway, as well as facilitating industry partnership.
-
Alumni & Friends

Alumni & Friends
There are 128,000 University of Galway alumni worldwide. Stay connected to your alumni community! Join our social networks and update your details online.
-
Community Engagement
Community Engagement
At University of Galway, we believe that the best learning takes place when you apply what you learn in a real world context. That's why many of our courses include work placements or community projects.


Sticky Page Nav
Sticky Page Nav
Visibility
The links appear wherever you place the 'Sticky Page Nav' CT. When you scroll past it, it will go to the top of the screen but then stick there. It will only scroll off the screen if all the page content is above it (this only happens if you have a lot of site navigation - i.e. a long sidenav, as demonstrated in this page).
If it is inserted half-way down a long page, and you scroll back up to the top, it will disappear off the bottom of the screen once you've passed it's original location.
Please note: This sticky behaviour while scrolling down only happens on wide-screen devices (anything wider than 1000px). On smaller devices (such as a phone, in portrait orientation) the list of links will stay where it is on the page - you will be able to scroll past it.
Appearance
This CT uses the full available width on the page, creating a horizontal navigation bar on your page.
If there are enough links on your page, the list of links will wrap onto another line.
There is an option to display the University logo on the left hand side. When this option is enabled, the links will be right-justified. When it is not, the links will be centred.
This can look good on widescreen pages but it can also be very effective on narrow pages (if there are few enough links for it all to appear on a single line).
All its links will be maroon. When you hover over them, they will be dark maroon.
When you click on a link, the page will scroll quickly to bring that heading into view.
Using Headlines
Just like with MS-Word's Table of Contents, you must create the headings on your page - then this CT can automatically link to them.
Creating Headlines
Headlines are sometimes added to your page automatically.
Every page get's a Heading 1 automatically - this is the section's name. Accessibility rules say that there should only ever be a single Heading 1 on a page, but you can have multiples of all the other levels - you just need to make sure that you don't ever skip a level.
Many content types (especially the ones that ask for a title) will create level 2 headings on the page for you. And the content types that create links on your page (e.g. Icon links) will often add level 3 headings.
Checking what headlines are already on your page
We provide a bookmarklet, called 'Show Headlines' that we recommend you add to your browser's bookmarks bar. With this added to your browser, you can simply preview your page, in T4, and click the bookmarklet to see exactly what headings are on your page, and their levels.
This bookmarklet works when you're browsing to published pages too.
You can install it from the 'Bookmarklets' page, available via this site's left navigation bar.
Manually adding headlines
You can also manually add headings to your page, using the WYSIWYG editor, which provides 2 menu options for this:
To add a headline:
- Type its text (on its own line).
- Bring the cursor back up onto the line you want to turn into a headline.
- Click on 'Format' in the editor's menu.
- Choose 'Formats > Headings > Heading X'
Adding this Feature
Adding this feature to a web page is as simple as:
- Adding the 'Sticky Page Nav' content type to the page
- Giving it a name (e.g. 'Page navigation')
- Specifying the heading level(s) to link to (this page uses "h3")
- Clicking 'Save and approve'.
When adding the content type you will enter the headings types to include in the list (this page links to H3s only). When creating those headings, you will need to be conscious of their length. Try to stick to 1- or 2-word headings - at least for the headings that will be linked to by the CT.
Once the CT has been added to your page, it's a good idea to preview the page before settling on the Heading text.
Demo
Display Logo ![]() Use this section to toggle the content type's options and see what they look like on different types of pages.
Use this section to toggle the content type's options and see what they look like on different types of pages.
Note: You change a page's width (and other options) using its section's 'Page Customisation Keywords' field - see my interactive demonstration for full information.


